I built this custom night light for my kids as a fun little project. It’s pretty easy so thought someone else might be inspired to do something similar.

Hardware
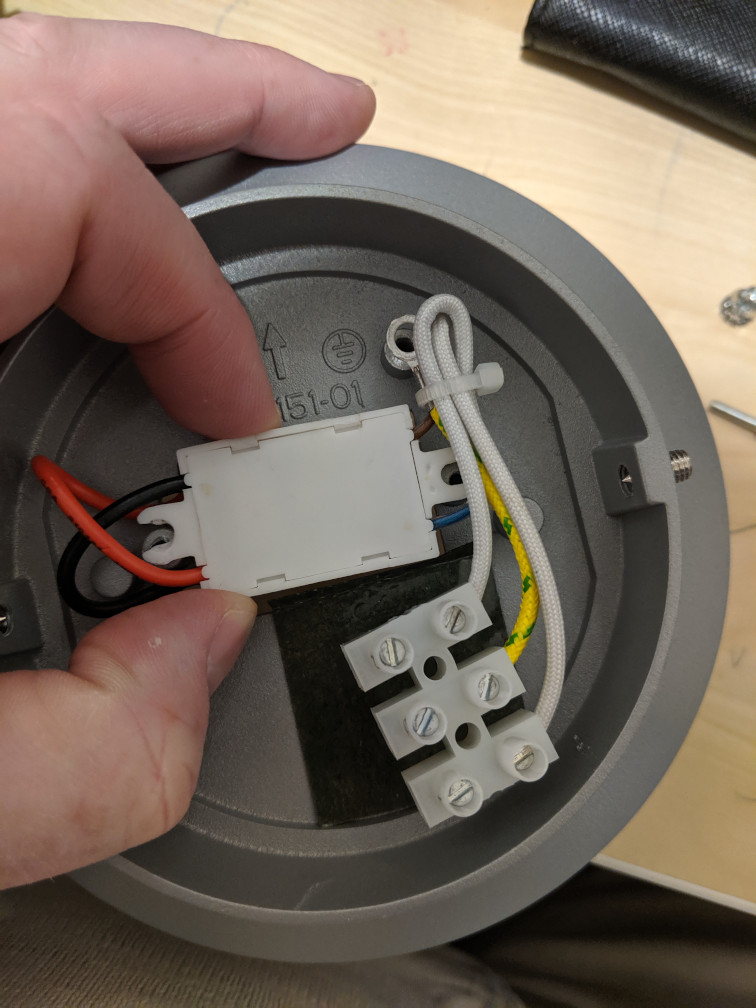
The core hardware is just an ESP8266 module and an Adafruit NeoPixel Ring. I also bought a 240V bunker light and took the guts out to use as the housing, as it looked nice and had a diffuser (you could pick anything that you like).
While the data pin of the NeoPixel Ring can pretty much connect to any GPIO pin on the ESP, bitbanging can cause flickering. It’s better to use pins 1, 2 or 3 on an ESP8266 where we can use other methods to talk to the device.
These methods are exposed in ESPHome’s support for NeoPixel.
ESP8266_DMA(default for ESP8266, only on pin GPIO3)ESP8266_UART0(only on pin GPIO1)ESP8266_UART1(only on pin GPIO2)ESP8266_ASYNC_UART0(only on pin GPIO1)ESP8266_ASYNC_UART1(only on pin GPIO2)ESP32_I2S_0(ESP32 only)ESP32_I2S_1(default for ESP32)BIT_BANG(can flicker a bit)
I chose GPIO2 and use ESP8266_UART1
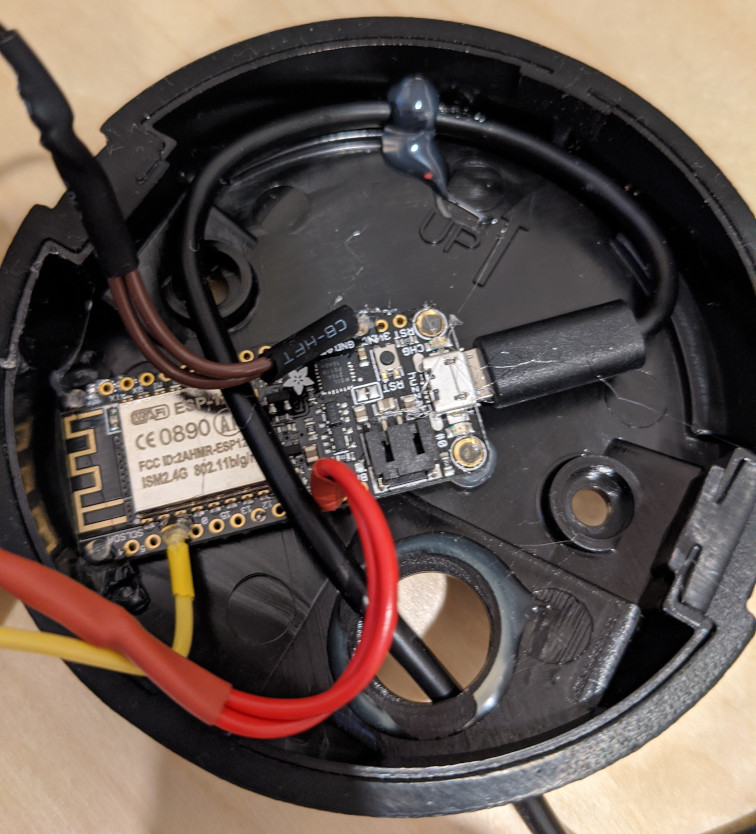
So, first things first, solder up some wires to 5V, GND and GPIO pin 2 on the ESP module. These connect to the 5V, GND and data pins on the NeoPixel Ring respectively.
It’s not very neat, but I used a hot glue gun to stick the ESP module into the bottom part of the bunker light, and fed the USB cable through for power and data.
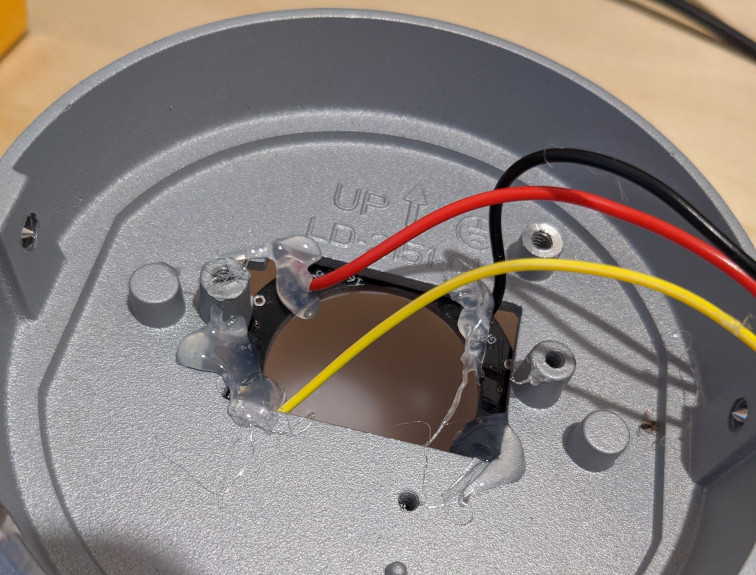
I hot-glued the NeoPixel Ring in-place on the inside of the bunker light, in the centre, shining outwards towards the diffuser.
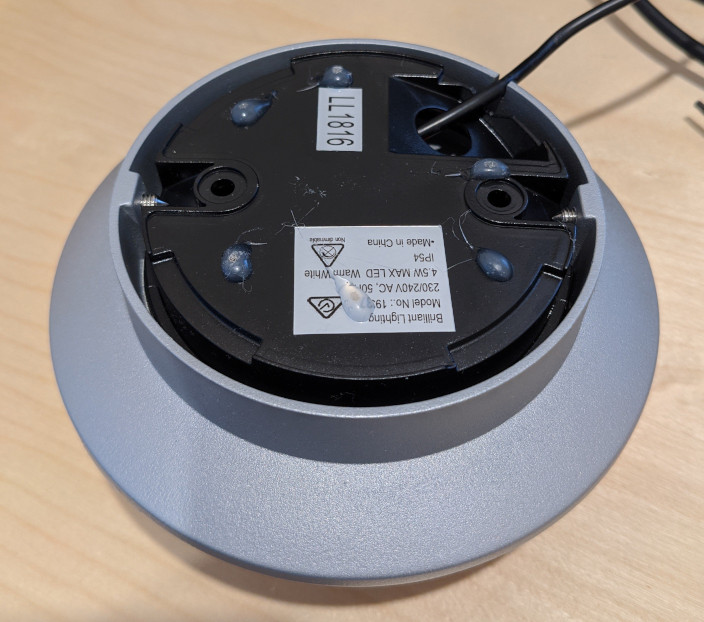
The bottom can then go back on and screws hold it in place. I used a hacksaw to create a little slot for the USB cable to sit in and then added hot-glue blobs for feet. All closed up, it looks like this underneath.
Looks a bit more professional from the top.

Code using ESPHome
I flashed the ESP8266 using ESPHome (see my earlier blog post) with this simple YAML config.
esphome:
  name: nightlight
  build_path: ./builds/nightlight
  platform: ESP8266
  board: huzzah
  esp8266_restore_from_flash: true

wifi:
  ssid: !secret wifi_ssid
  password: !secret wifi_password

# Enable logging
logger:

# Enable Home Assistant API
api:
  password: '!secret api_password'

# Enable over the air updates
ota:
  password: !secret ota_password

mqtt:
  broker: !secret mqtt_broker
  username: !secret mqtt_username
  password: !secret mqtt_password
  port: !secret mqtt_port

light:
  - platform: neopixelbus
    pin: GPIO2
    method: ESP8266_UART1
    num_leds: 16
    type: GRBW
    name: "Nightlight"
    effects:
      # Customize parameters
      - random:
          name: "Slow Random"
          transition_length: 30s
          update_interval: 30s
      - random:
          name: "Fast Random"
          transition_length: 4s
          update_interval: 5s
      - addressable_rainbow:
          name: Rainbow
          speed: 10
          width: 50
      - addressable_twinkle:
          name: Twinkle Effect
          twinkle_probability: 5%
          progress_interval: 4ms
      - addressable_random_twinkle:
          name: Random Twinkle
          twinkle_probability: 5%
          progress_interval: 32ms
      - addressable_fireworks:
          name: Fireworks
          update_interval: 32ms
          spark_probability: 10%
          use_random_color: false
          fade_out_rate: 120
      - addressable_flicker:
          name: Flicker
The esp8266_restore_from_flash option is useful because if the light is on and someone accidentally turns it off, it will go back to the same state when it is turned back on. It does wear the flash out more quickly, however.
The important settings are the light component with the neopixelbus platform, which is where all the magic happens. We specify which GPIO on the ESP the data line on the NeoPixel Ring is connected to (pin 2 in my case). The method we use needs to match the pin (as discussed above) and in this example is ESP8266_UART1.
The number of LEDs must match the actual number on the NeoPixel Ring, in my case 16. This is used when talking to the on-chip LED driver and calculating effects, etc.
Similarly, the LED type is important as it determines which order the colours are in (swap around if colours don’t match). This must match the actual type of NeoPixel Ring, in my case I’m using an RGBW model which has a separate white LED and is in the order GRBW.
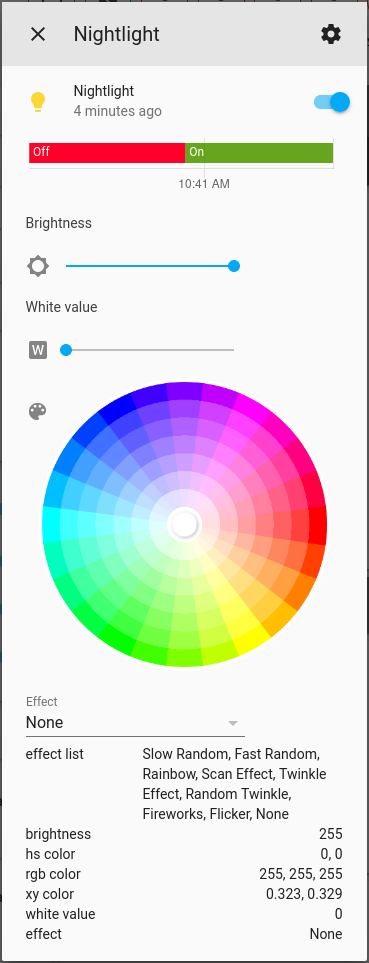
Finally, you get all sorts of effects for free, you just need to list the ones you want and any options for them. These show up in Home Assistant under the advanced view of the light (screenshot below).
Now it’s a matter of plugging the ESP module in and flashing it with esphome.
esphome nightlight.yaml run
Home Assistant
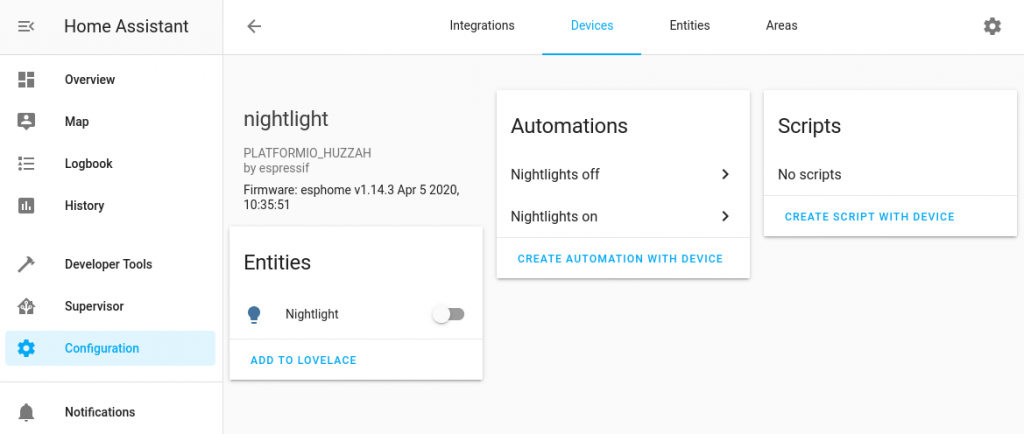
After a reboot, the device should automatically show up in Home Assistant under Configuration -> Devices. From here you can add it to the Lovelace dashboard and make Automations or Scripts for the device.
Adding it to Lovelace dashboard looks something like this, which lets you easily turn the light on and off and set the brightness.

You can also get advanced settings for the light, where you can change brightness, colours and apply effects.
Effects
One of the great things about using ESPHome is all the effects which are defined in the YAML file. To apply an effect, choose it from the advanced device view in Home Assistant (as per screenshot above).
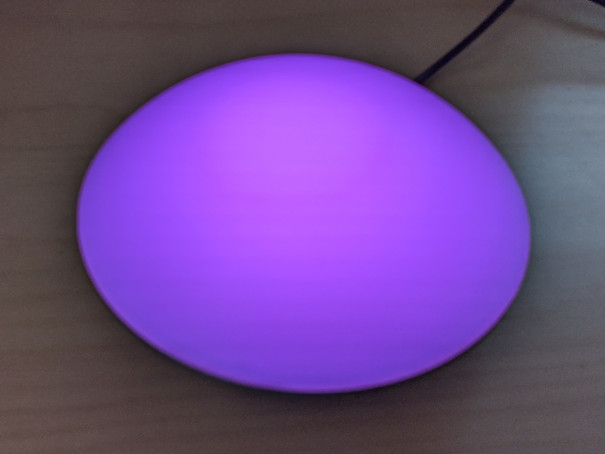
This is what rainbow looks like.

The kids love to select the colours and effects they want!
Automation
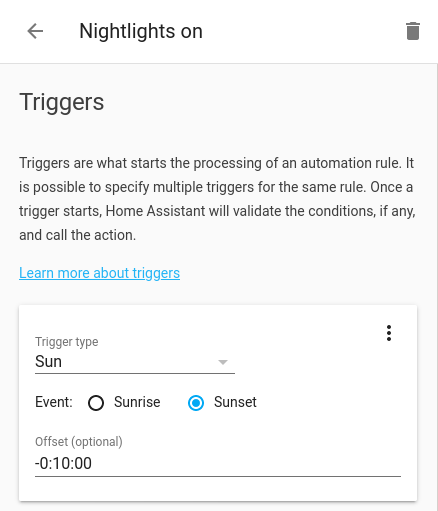
So, once you have the nightlight showing up in Home Assistant, we can create a simple automation to turn it on at sunset and off at sunrise.
Go to Configuration -> Automation and add a new one. You can fill in any name you like and there’s an Execute button there when you want to test it.
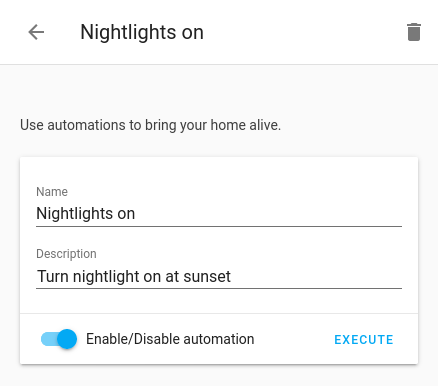
The trigger uses the Sun module and runs 10 minutes before sunset.
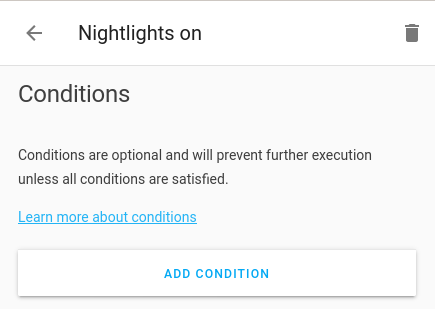
I don’t use Conditions, but you could. For example, only do this when someone’s at home.
The Actions are set to call the homeassistant.turn_on function and specifies the device(s). Note this takes a comma separated list, so if you have more than one nightlight you can do it with the one automation rule.
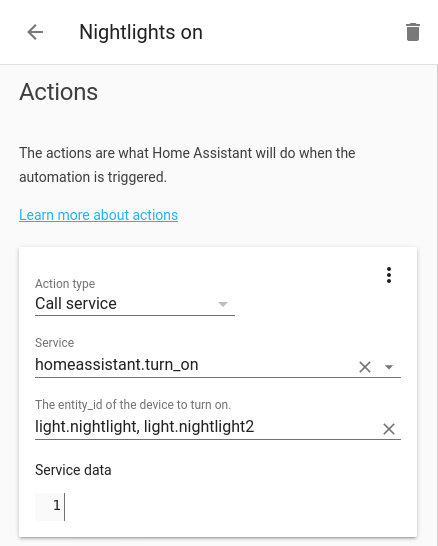
That’s it! You can create another one for sunrise, but instead of calling homeassistant.turn_on just call homeassistant.turn_off and use Sunrise instead Sunset.

One thought on “Custom WiFi enabled nightlight with ESPHome and Home Assistant”
Excellent project, looks great. Well done and thanks for sharing!