I do a lot of dev work using my Ansible virtual infrastructure role to spin up various KVM guests across multiple hosts using YAML based inventories. I’ve just put my hand up to try and help maintain the Ansible libvirt community collection, which I use in my role.
This is my attempt to start documenting how I configure my Ansible dev environment on Fedora (but much should work for other distros). These instructions are taken from a number of places, including the project’s quick start guide as well as the official installation and developing modules guides.
There are a number of versions of Ansible which are supported on a number of Python releases (including 2 and 3). Ideally we want to be able to use any combination. To do this, we can use Git to get the Ansible code and manage the release we are working on or testing against, together with virtual environments for the Python version we need.
The process is something like this:
- Fork Ansible code in GitHub and clone
- Checkout the version of Ansible we want to use
- Install the version of Python we want to use (if not the host’s)
- Create and activate a Python virtual environment
- Activate the Ansible development environment, using the code and Python from above
- Create a Git branch and work on the code!
Each time we change the version of Ansible or Python, we can simple switch and re-activate.
Fork Ansible repos
As we use Git, the first step is to get our own copy of the code.
Browse to the Ansible project and fork into your own namespace. I am working on community.libvirt so I have also forked this into my own namespace.
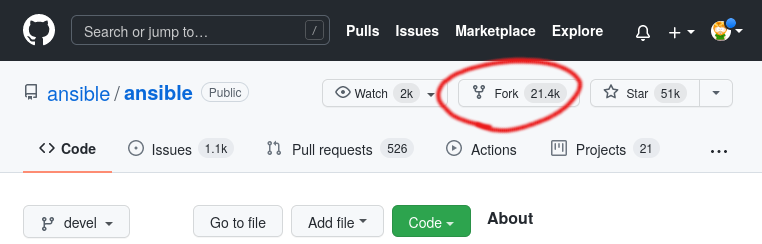
We will then use the resulting forked URLs to clone the repositories in the next step, for example my Ansible clone URL over SSH is git@github.com:csmart/ansible.git (copy yours from your forked repo in GitHub).
Clone repos
OK, now we are ready to clone the repos down from your own fork and add a remote pointing to upstream to fetch updates.
Get the Ansible code
Ansible will go into the ~/ansible directory (you can change that if you prefer), which will checkout the devel branch by default. We’ll call the upstream remote, upstream and fetch updates from both remotes. Note that the URL to clone from will be different than mine (copy yours from your forked repo in GitHub), but the upstream URL will be the same.
git clone git@github.com:csmart/ansible.git ~/ansible
cd ~/ansible
git remote add upstream https://github.com/ansible/ansible.git
git remote update
Get the Ansible collection code
Next, we clone to collection repository. Note that this goes into a specific directory structure to match the default locations that Ansible will search. Again, your clone URL will be different to mine, but the upstream URL will be the same.
mkdir -p ~/ansible_collections/community/libvirt
git clone git@github.com:csmart/community.libvirt.git ~/ansible_collections/community/libvirt/
cd ~/ansible_collections/community/libvirt/
git remote add upstream https://github.com/ansible-collections/community.libvirt.git
git remote update
Some versions of Ansible will not automatically look in this location for collections, so we can also add it to our path. We will specify our local paths before the system wide path so that collections we’re working on will be found first.
export ANSIBLE_COLLECTIONS_PATH="${HOME}/ansible_collections:${HOME}/.ansible/collections:/usr/share/ansible/collections"Add that line to your ~/.bashrc file if you want it to be automatic.
Switching Ansible versions
Once you have the Ansible git repository, you will be in the devel branch by default. To test your module with a different major release, simply check out the corresponding branch. You can see all latest release branches like so.
cd ~/ansible
git fetch upstream
git --no-pager branch -r --list "upstream/stable*" |sort -V
For example, to test against Ansible 2.12, checkout the stable-2.12 branch.
cd ~/ansible
git checkout stable-2.12
You can also get a specific release, for example, v2.12.1, by checking out the corresponding tag into a new local branch (hence the -b option).
cd ~/ansible
git --no-pager tag --list "v*" |sort -V
git checkout -b v2.12.1
Next we will get a specific version of Python to use with Ansible.
Switching Python versions
By default, Ansible will use the version installed on the host. Fortunately, Fedora provides versions of Python which are supported upstream, so we can easily switch. This follows the pattern python${major}.${minor} for example, python2.7 and python3.9, you simple install the versions you want.
If you’re not on Fedora, your distro might do something similar, or you may need to use a tool like Anaconda.
sudo dnf install python2.7 python3.6 python3.9 python3.11Now, we simply use that Python version exactly as the command (such as python3.9) when creating our virtual environments.
Create Python virtual environment
Now that we have the Ansible code and a number of Python interpreters, let’s prepare the Python virtual environments which live inside the clone of the Ansible Git repository.
I’m using freshly installed Python 3.9 from the Fedora host in my example and note that I’m specifying the version as a subdirectory in the virtual environment directory so that we can easily switch. Although venv is a directory inside the code, it will be ignored by Git.
cd ~/ansible
python3.9 -m venv venv/3.9
For Python 2 we need to install virtualenv and create it differently.
sudo dnf install /usr/bin/virtualenv
cd ~/ansible
virtualenv --python /usr/bin/python2.7 env/2.7
Now we can activate our Python environment for the version we want (e.g. 3.9), update pip and install Ansible requirements.
We also need to do this each time we switch versions of Python or start a new shell session.
export PYTHON_VERSION=3.9
source ~/ansible/venv/${PYTHON_VERSION}/bin/activate
python -m pip install -U pip setuptools
python -m pip install -r ~/ansible/requirements.txt
Deactivating Python virtual environment
To deactivate a Python environment, simple run the deactivate command which will return you to the default system Python.
Activate Ansible hacking environment
Now that we have the code and a version of Python we want to use, we can run the a script from Ansible which will configure your current session to run from the source version in the git repo, rather than needing a full system install.
You should do this every time you switch between versions of Ansible or Python, or starting a new shell session.
source ~/ansible/hacking/env-setup
python -m pip install -U pip setuptools
python -m pip install -r ~/ansible/requirements.txt
Working on Ansible code
Remember that we have a remote pointing upstream to get the latest changes as well as our own fork in GitHub which is where we will push any changes.
To work on the code, we need to create a branch from the relevant upstream branch. We can see all of the latest available upstream branches with the following.
cd ~/ansible
git fetch upstream
git --no-pager branch --remote --list "upstream/*" |sort -V
For example, if we’re working on a feature we probably branch from devel. We can do this with a single checkout command which will create the new branch.
git checkout -b my-branch upstream/develLet’s push this new branch to our fork straight away and enable tracking so that don’t need to keep specifying where to push to.
git push --set-upstream origin my-branchWhen you’re ready, submit a pull request via GitHub to have your code merged into upstream Ansible.
Get latest Ansible code updates
To pull in the latest code updates into your feature branch, we use the Git rebase function. This way, any local changes get moved on top of the latest commits (rather than a merge) as though they had always been added there. For example, if you are working on my-branch which was branched from devel, we need to fetch and rebase in the latest changes from upstream/devel.
git checkout my-branch
git pull --rebase upstream devel
If you have any local commits, you will need to force push your branch to your GitHub fork as the Git history has been rewritten with the rebase and your commit hashes will have changed. This will automatically update any merge requests.
Note that the branch is already tracking to our fork, so we don’t need to specify where to push to.
git push --forceWell, I think that’s a start at least…
4 thoughts on “Setting up an Ansible dev environment”
Thanks Chris, this looks useful, but please don’t use python2 unless you absolutely have to.
Python 2.7 has been unsupported for over two years now (less than two years when you wrote this post though).
Definitely don’t use python2 in any environment with untrusted users.
Hey Neill, yeah that’s true, just that Ansible maintainers still need to support Python 2 for all modules, I guess because enterprise distros still provide support and backports for it? Hopefully at some point Ansible can become Python 3 only…
I guess that falls in to the “absolutely have to” category 🙂
Should have done more reading before firing off a comment. Sorry for getting on my hobby horse.
Oh, no problem. The deprecation of Python 2 is a valid point that bears repeating.