Setting up OpenStack Ansible (OSA) All-in-one (AIO) behind a proxy requires a couple of settings, but it should work fine (we’ll also configure the wider system). There are two types of git repos that we should configure for (unless you’re an OpenStack developer), those that use http (or https) and those that use the git protocol.
Firstly, this assumes an Ubuntu 14.04 server install (with at least 60GB of free space on / partition).
All commands are run as the root user, so switch to root first.
sudo -i
Export variables for ease of setup
Setting these variables here means that you can copy and paste the relevant commands from the rest of this blog post.
Note: Make sure that your proxy is fully resolvable and then replace the settings below with your actual proxy details (leave out user:password if you don’t use one).
export PROXY_PROTO="http"

export PROXY_HOST="user:password@proxy"

export PROXY_PORT="3128"

export PROXY="${PROXY_PROTO}://${PROXY_HOST}:${PROXY_PORT}"
First, install some essentials (reboot after upgrade if you like).
echo "Acquire::http::Proxy \"${PROXY}\";" \

> /etc/apt/apt.conf.d/90proxy

apt-get update && apt-get upgrade

apt-get install git openssh-server rsync socat screen vim
Configure global proxies
For any http:// or https:// repositories we can just set a shell environment variable. We’ll set this in /etc/environment so that all future shells have it automatically.
cat >> /etc/environment << EOF

export http_proxy="${PROXY}"

export https_proxy="${PROXY}"

export HTTP_PROXY="${PROXY}"

export HTTPS_PROXY="${PROXY}"

export ftp_proxy="${PROXY}"

export FTP_PROXY="${PROXY}"

export no_proxy=localhost

export NO_PROXY=localhost

EOF
Source this to set the proxy variables in your current shell.
source /etc/environment
Tell sudo to keep these environment variables
echo 'Defaults env_keep = "http_proxy https_proxy ftp_proxy \

no_proxy HTTP_PROXY HTTPS_PROXY FTP_PROXY NO_PROXY"' \

> /etc/sudoers.d/01_proxy
Configure Git
For any git:// repositories we need to make a script that uses socat (you could use netcat) and tell Git to use this as the proxy.
cat > /usr/local/bin/git-proxy.sh << EOF

#!/bin/bash

# \$1 = hostname, \$2 = port

exec socat STDIO PROXY:${PROXY_HOST}:\${1}:\${2},proxyport=${PROXY_PORT}

EOF
Make it executable.
chmod a+x /usr/local/bin/git-proxy.sh
Tell Git to proxy connections through this script.
git config --global core.gitProxy /usr/local/bin/git-proxy.sh
Clone OpenStack Ansible
OK, let’s clone the OpenStack Ansible repository! We’re living on the edge and so will build from the tip of the master branch.
git clone git://git.openstack.org/openstack/openstack-ansible \

/opt/openstack-ansible

cd /opt/openstack-ansible/
If you would prefer to build from a specific release, such as the latest stable, feel free to now check out the appropriate tag. For example, at the time of writing this is tag 13.3.1. You can get a list of tags by running the git tag command.
# Only run this if you want to build the 13.3.1 release

git checkout -b tag-13.3.1 13.3.1
Or if you prefer, you can checkout the tip of the stable branch which prepares for the upcoming stable minor release.
# Only run this if you want to build the latest stable code

git checkout -b stable/matika origin/stable/mitaka
Prepare log location
If something goes wrong, it’s handy to be able to have the log available.
export ANSIBLE_LOG_PATH=/root/ansible-log
Bootstrap Ansible
Now we can kick off the ansible bootstrap. This prepares the system with all of the Ansible roles that make up an OpenStack environment.
./scripts/bootstrap-ansible.sh
Upon success, you should see:
System is bootstrapped and ready for use.
Bootstrap OpenStack Ansible All In One
Now let’s bootstrap the all in one system. This configures the host with appropriate disks and network configuration, etc ready to run the OpenStack environment in containers.
./scripts/bootstrap-aio.sh
Run the Ansible playbooks
The final task is to run the playbooks, which sets up all of the OpenStack components on the host and containers. Before we proceed, however, this requires some additional configuration for the proxy.
The user_variables.yml file under the root filesystem at /etc/openstack_deploy/user_variables.yml is where we configure environment variables for OSA to export and set some other options (again, note the leading / before etc – do not modify the template file at /opt/openstack-ansible/etc/openstack_deploy by mistake).
cat >> /etc/openstack_deploy/user_variables.yml << EOF

#

## Proxy settings

proxy_env_url: "\"${PROXY}\""

no_proxy_env: "\"localhost,127.0.0.1,{{ internal_lb_vip_address }},{{ external_lb_vip_address }},{% for host in groups['all_containers'] %}{{ hostvars[host]['container_address'] }}{% if not loop.last %},{% endif %}{% endfor %}\""

global_environment_variables:

  HTTP_PROXY: "{{ proxy_env_url }}"

  HTTPS_PROXY: "{{ proxy_env_url }}"

  NO_PROXY: "{{ no_proxy_env }}"

  http_proxy: "{{ proxy_env_url }}"

  https_proxy: "{{ proxy_env_url }}"

  no_proxy: "{{ no_proxy_env }}"

EOF
Secondly, if you’re running the latest stable, 13.3.x, you will need to make a small change to pip package list for the keystone (authentication component) container. Currently it pulls in httplib2 version 0.8, however this does not appear to respect the NO_PROXY variable and so keystone provisioning fails. Version 0.9 seems to fix this problem.
sed -i 's/state: present/state: latest/' \

/etc/ansible/roles/os_keystone/tasks/keystone_install.yml
Now run the playbooks!
Note: This will take a long time, perhaps a few hours, so run it in a screen or tmux session.
screen

time ./scripts/run-playbooks.sh
Verify containers
Once the playbooks complete, you should be able to list your running containers and see their status (there will be a couple of dozen).
lxc-ls -f
Log into OpenStack
Now that the system is complete, we can start using OpenStack!
You should be able to use your web browser to log into Horizon, the OpenStack Dashboard, at your AIO hosts’s IP address.
If you’re not sure what IP that is, you can find out by looking at which address port 443 is running on.
netstat -ltnp |grep 443
The admin user’s password is available in the user_secrets.yml file on the AIO host.
grep keystone_auth_admin_password \

/etc/openstack_deploy/user_secrets.yml
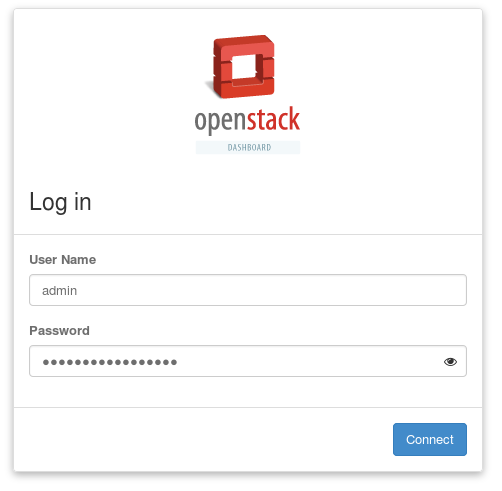
A successful login should reveal the admin dashboard.

Enjoy your OpenStack Ansible All-in-one!

7 thoughts on “Setting up OpenStack Ansible All-in-one behind a proxy”
What version of Ansible are you using?
It depends which branch you want to build from, in master it’s 2.2.1.0. https://github.com/openstack/openstack-ansible/blob/master/scripts/bootstrap-ansible.sh#L25
Chris,
All the best to you in 2017.
What to do on the first day of the new year?
Install a test OpenStack environment !
Thanks for these instructions.
The OpenStack server is running as a KVM hosted, Ubuntu guest VM on a laptop installed with Debian (Jessie).
The OpenStack VM has been provisioned with 14GB RAM, and a 100GB virtual disk. There is a second 100GB virtual disk which has not as yet been used.
Well building OpenStack server is only the beginning, now starts the testing.
Below is a brief set of notes on the build process.
===========================================================
OpenStack VM
————
# free -m
total used free shared buff/cache available
Mem: 13934 7052 217 330 6665 6046
Swap: 10236 79 10157
# lsblk -d
NAME MAJ:MIN RM SIZE RO TYPE MOUNTPOINT
sr0 11:0 1 1024M 0 rom
vda 253:0 0 100G 0 disk
vdb 253:16 0 100G 0 disk
loop0 7:0 0 1T 0 loop
loop1 7:1 0 1T 0 loop /var/lib/nova/instances
loop2 7:2 0 1T 0 loop /srv/swift1.img
loop3 7:3 0 1T 0 loop /srv/swift2.img
loop4 7:4 0 1T 0 loop /srv/swift3.img
# df -h
Filesystem Size Used Avail Use% Mounted on
udev 6.8G 0 6.8G 0% /dev
tmpfs 1.4G 138M 1.3G 10% /run
/dev/vda1 89G 29G 56G 35% /
tmpfs 6.9G 4.0K 6.9G 1% /dev/shm
tmpfs 5.0M 0 5.0M 0% /run/lock
tmpfs 6.9G 0 6.9G 0% /sys/fs/cgroup
tmpfs 1.4G 0 1.4G 0% /run/user/0
/dev/loop1 1008G 72M 957G 1% /var/lib/nova/instances
/dev/loop2 1.0T 33M 1.0T 1% /srv/swift1.img
/dev/loop3 1.0T 33M 1.0T 1% /srv/swift2.img
/dev/loop4 1.0T 33M 1.0T 1% /srv/swift3.img
cgmfs 100K 0 100K 0% /run/cgmanager/fs
===========================================================
Short list of commands used to install OpenStack
————————————————-
apt-get update && apt-get dist-upgrade && apt-get upgrade && reboot
git clone git://git.openstack.org/openstack/openstack-ansible /opt/openstack-ansible
cd /opt/openstack-ansible/
git tag -l
git checkout stable/newton
git describe –abbrev=0 –tags
git checkout 14.0.4
export ANSIBLE_LOG_PATH=/root/ansible-log
./scripts/bootstrap-ansible.sh
ls -al /etc/openstack_deploy/user_secrets.yml
./scripts/bootstrap-aio.sh
ls -al /etc/openstack_deploy/user_secrets.yml
nano /etc/openstack_deploy/user_secrets.yml
time ./scripts/run-playbooks.sh
netstat -ltnp |grep 443
lxc-ls -f
Cool, thanks George. Happy New Year!
Hi ,
i have followed all the hardware requirement and installed open ssh and ran bootstrap-ansible.sh file successfully.then after running the bootstrap-aio.sh file ,my machine locked.i’m not able to open one more session(ssh to my machine).by mistake i closed my session and i can’t open new session. I’m suspecting bootstrap-aio.sh file changed my private/public key. can anybody tell what exactly happened? how to resolve this issue??
Hi Suresh,
Can you try ssh with the options -vv on the end, then you might see more information about why it is failing.
As in:
ssh -vv user@remoteHi Chris,
sure i ll try and let you know